
The roster import tool helps training centers save time by adding new students and instructors to the roster in bulk, rather than entering each account by hand. We’re excited to share a set of improvements coming on October 6, 2026, that make importing even smoother.
The process you know stays the same. You’ll still download a template, fill it in, and upload it. What’s new is a cleaner screen, support for Excel files, better fault tolerance, and more detailed guidance whenever a file needs attention.
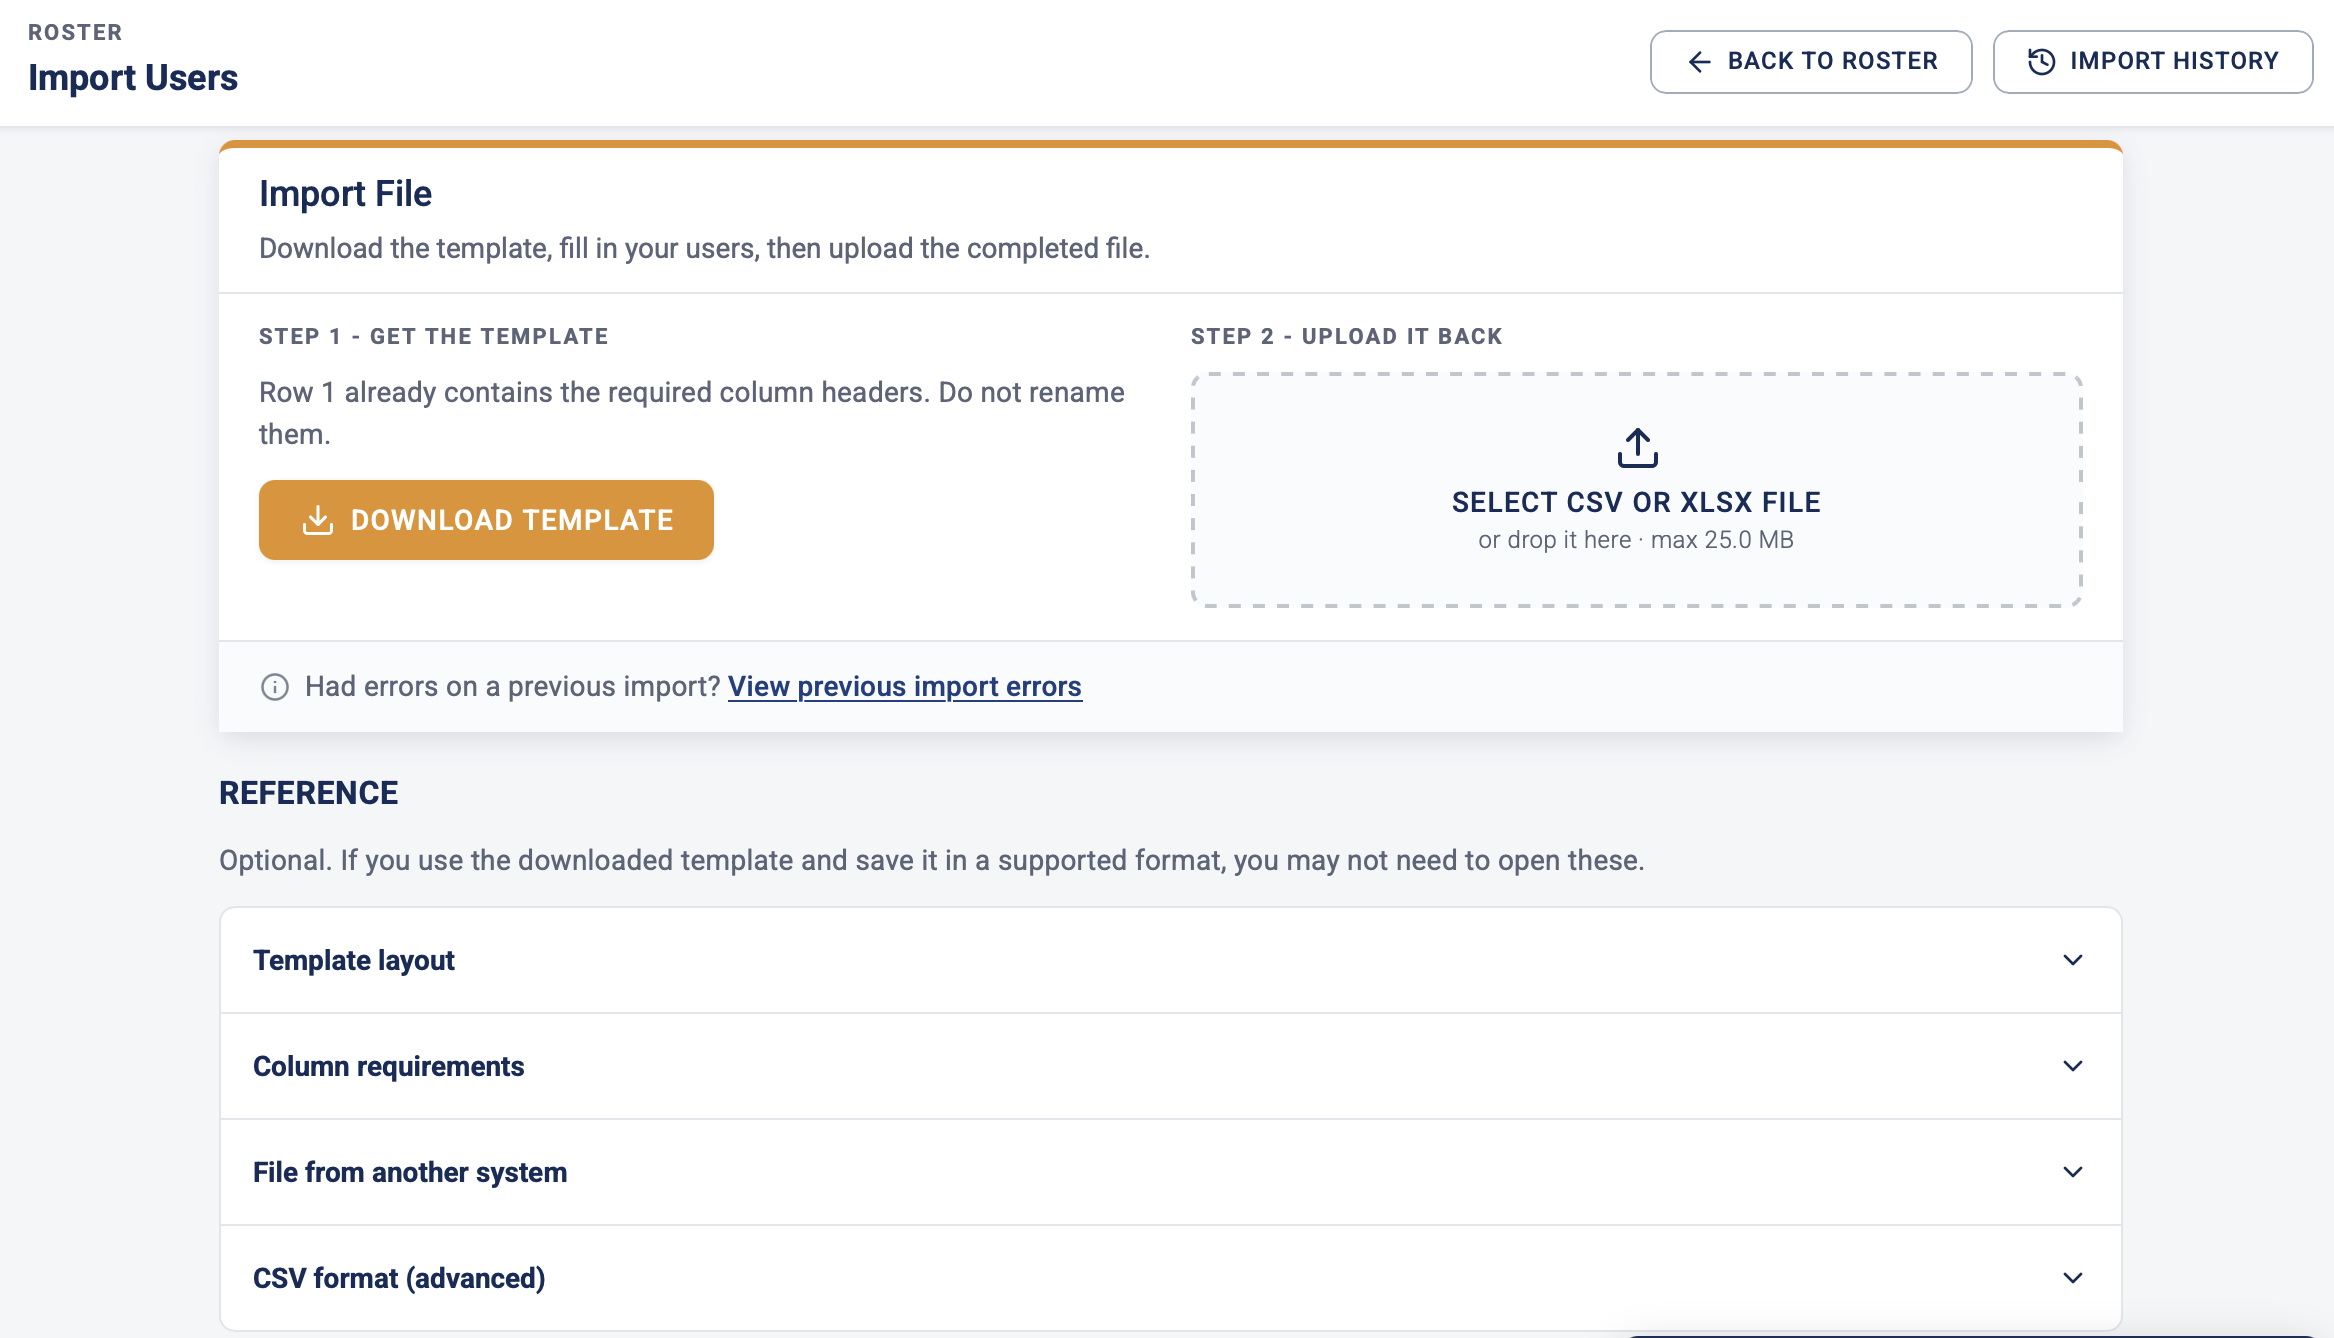
What’s New
Excel files are now supported. In addition to .CSV files, you can now download the template and upload your completed file in Excel (.xlsx) format. If your team works in Excel, there’s no need to convert anything.
Smarter file handling. The updated import engine is more flexible with the small formatting quirks that can creep into a file, so more of your uploads will go through on the first try.
A refreshed, easier-to-follow screen. Both steps now sit side by side on a single card, so the whole process is visible at a glance. Helpful reference guides, including tips for files exported from another system, are tucked into a Reference section below, there when you need them and out of the way when you don’t.
More detailed error information. If something in your file needs attention, you’ll see exactly which rows and fields to fix, making corrections quick and simple.
Walking Through the Updated Import
Getting Started
From the Roster screen, click Import Users on the right side of the page, right where you’ve always found it.
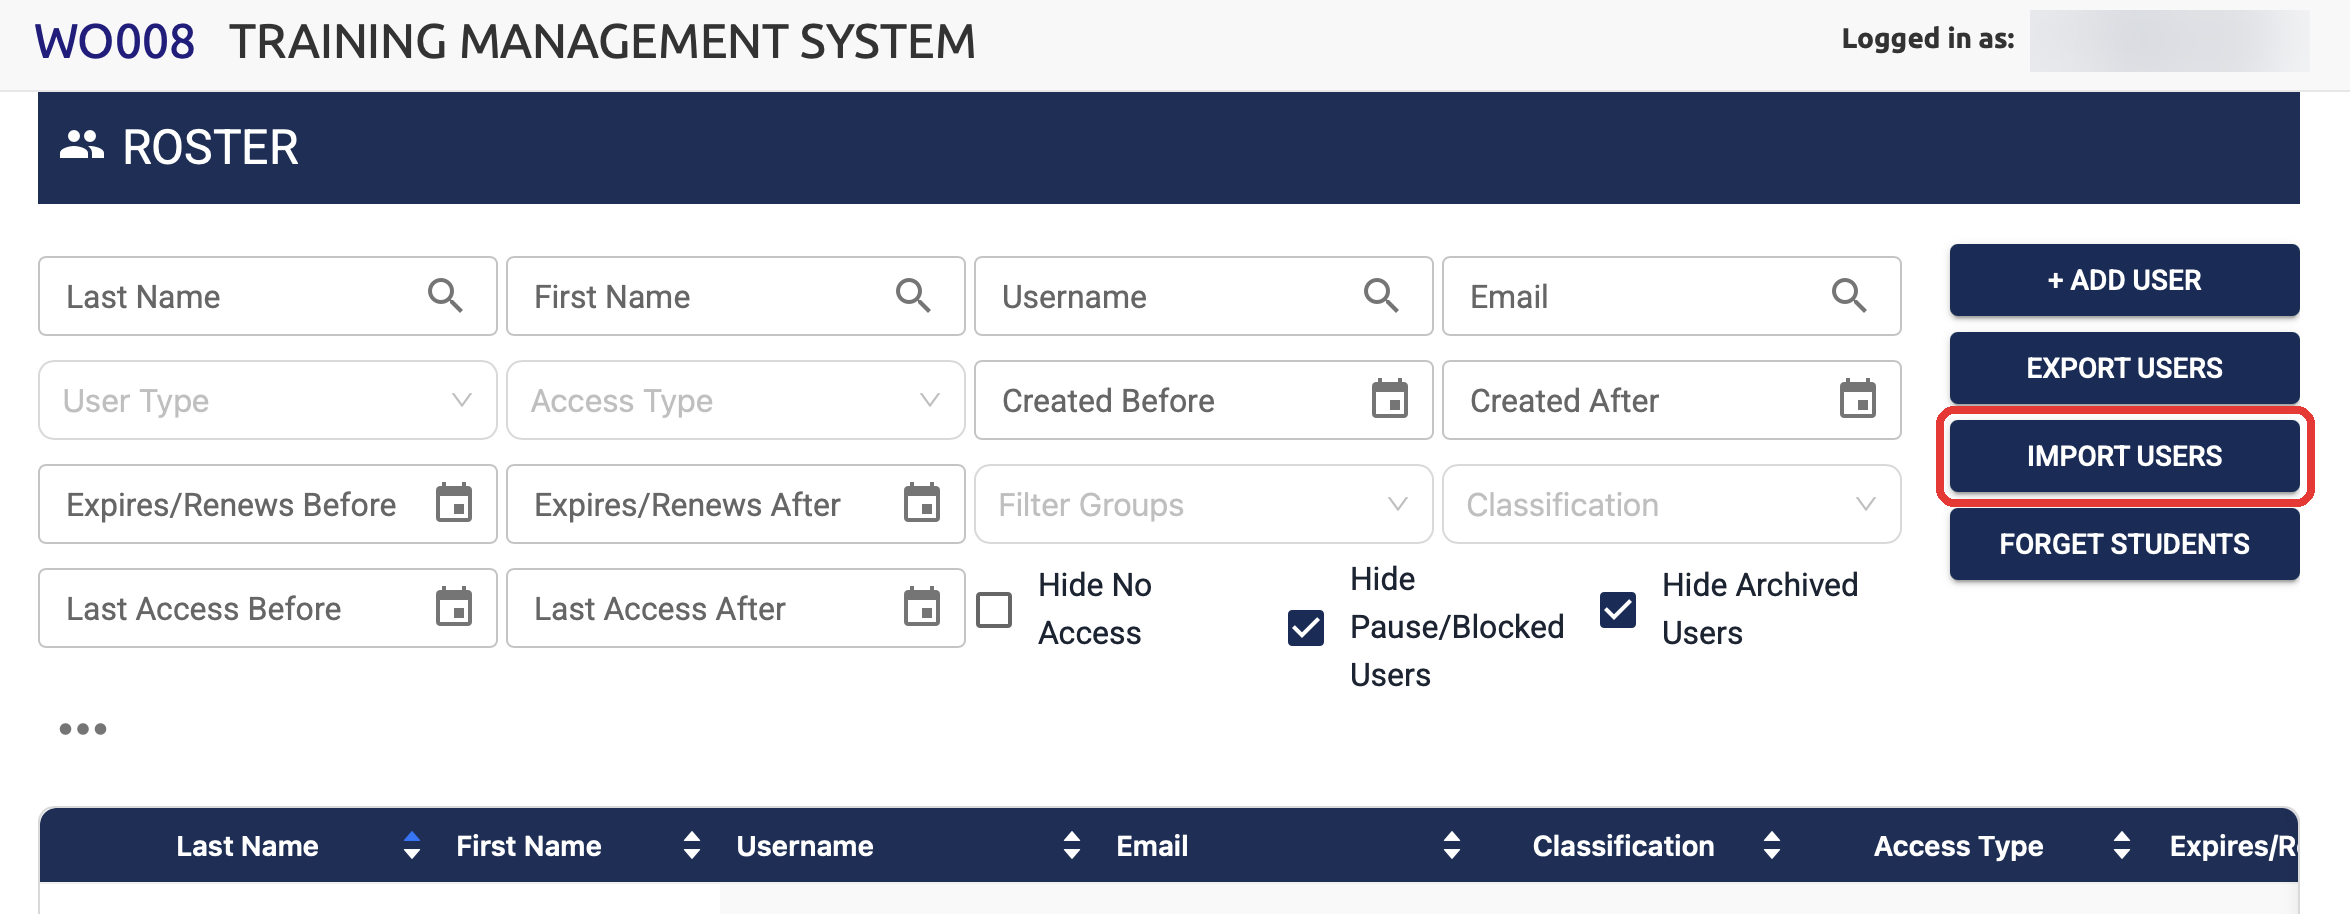
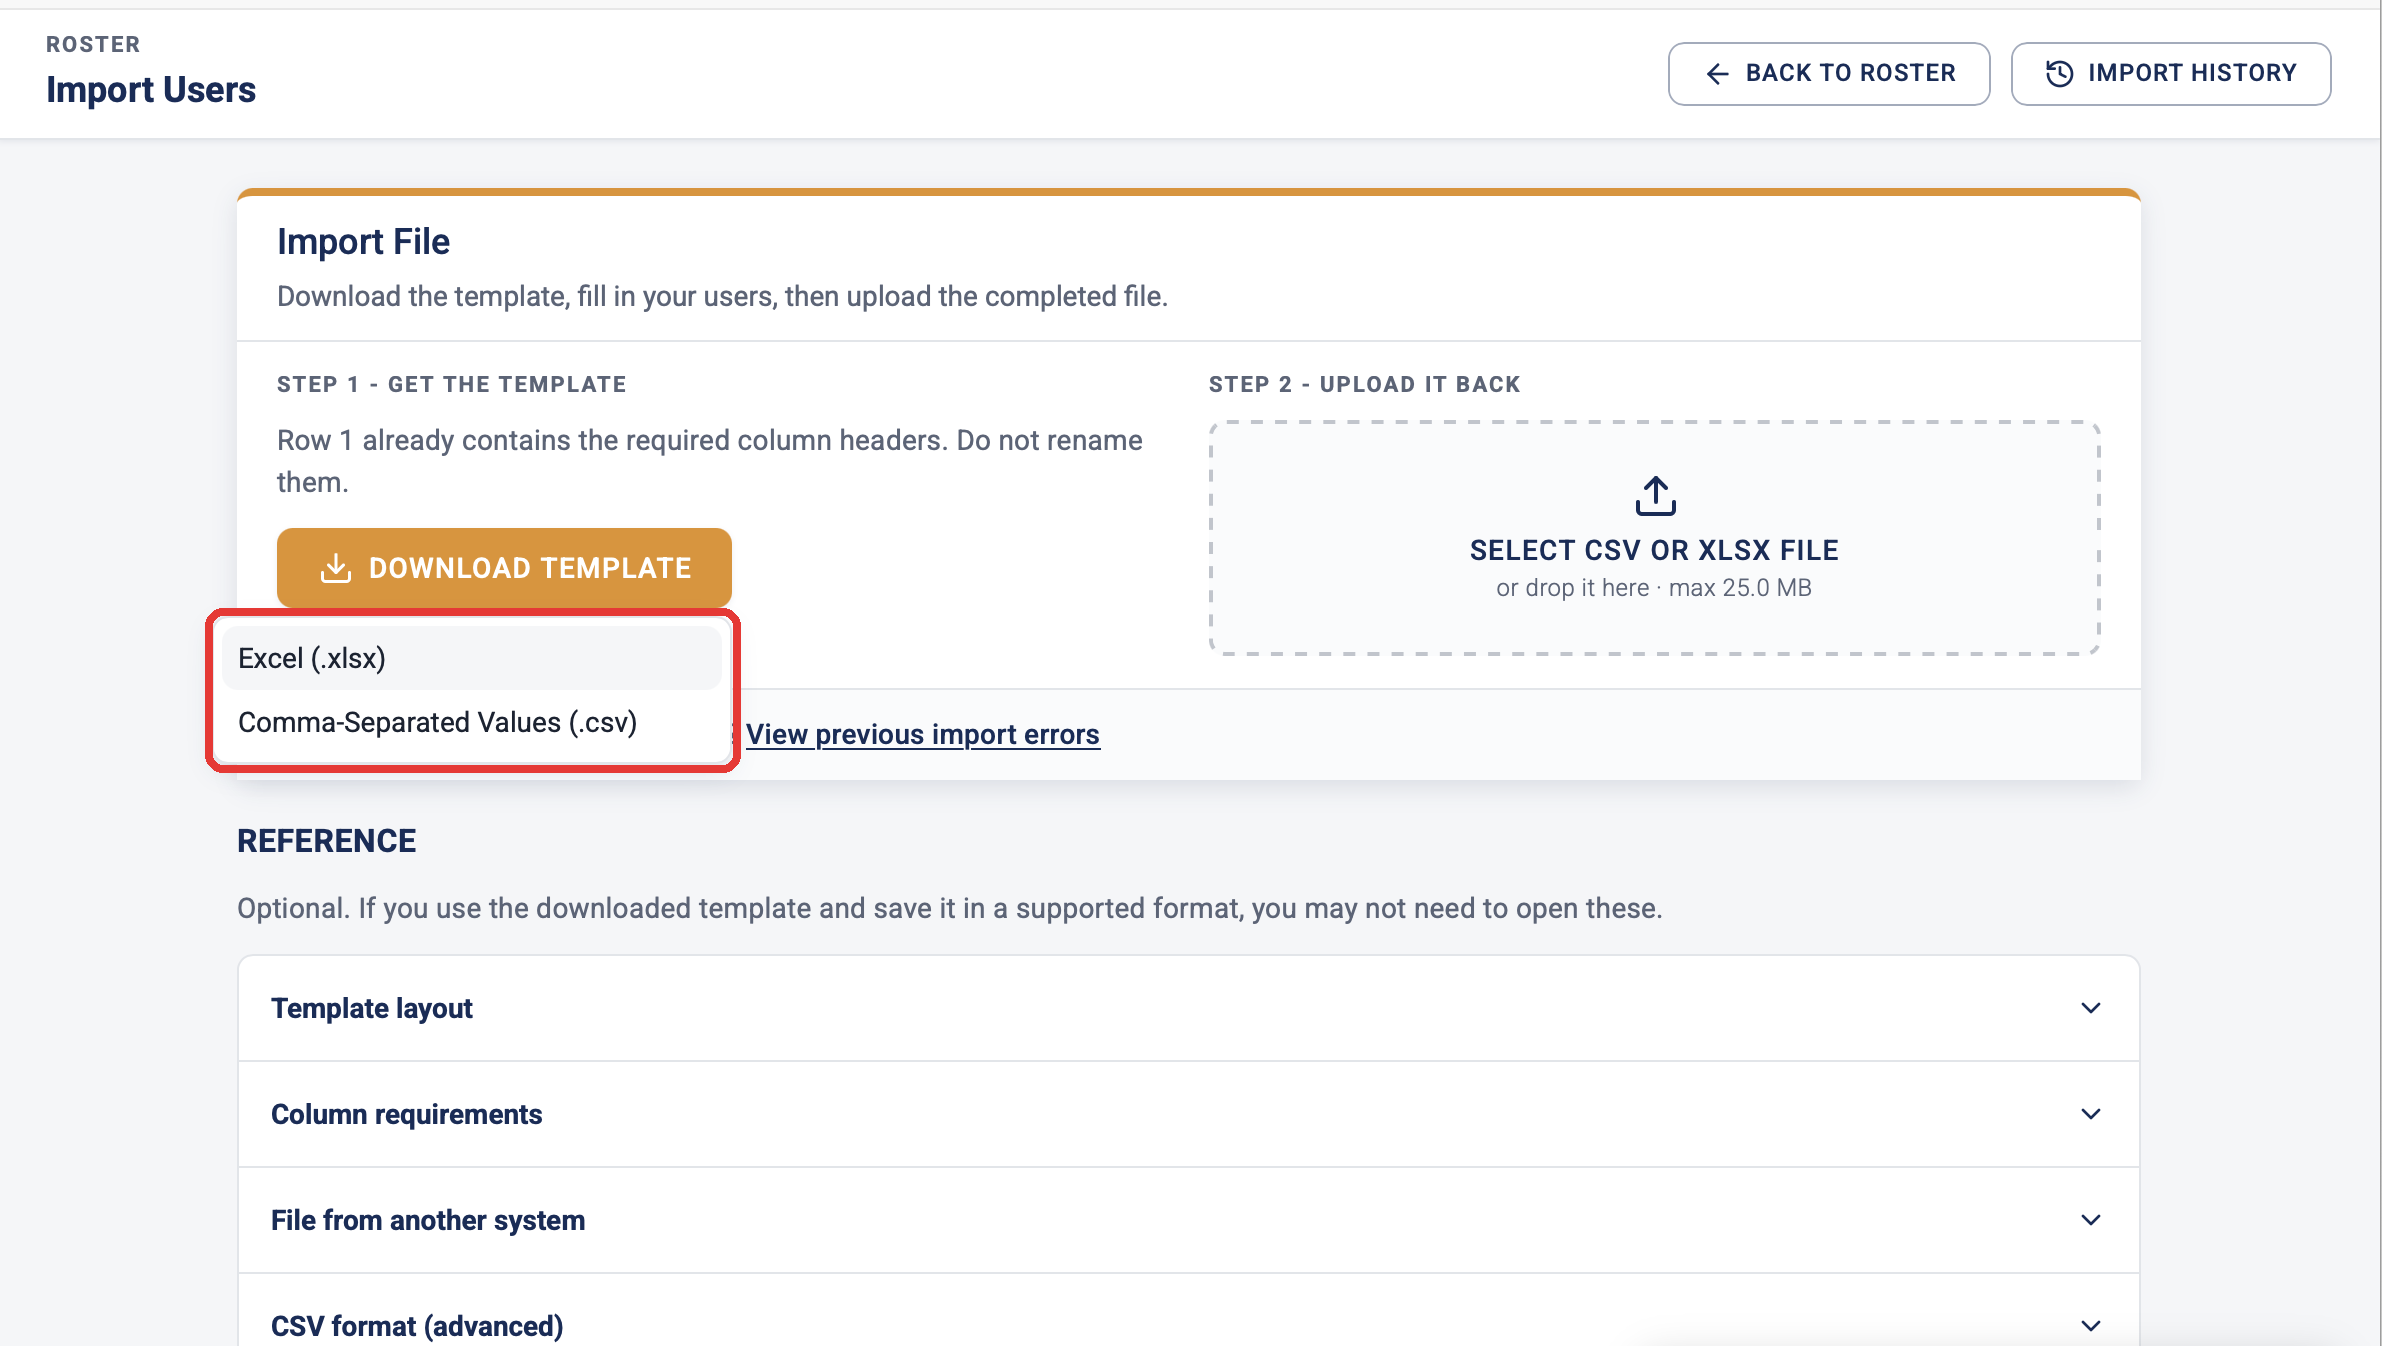
Step 1: Download the Template
Click Download Template and choose the format that works best for you: Excel (.xlsx) or Comma-Separated Values (.csv). Row 1 already contains the required column headers, so just fill in your users below them and leave the headers as they are.
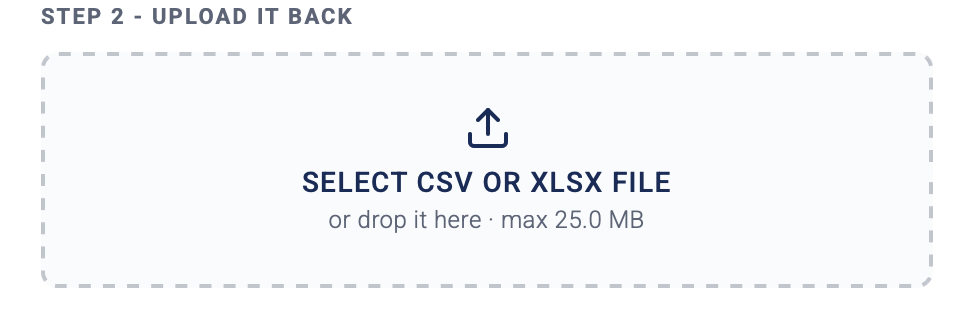
Step 2: Upload Your File
When your file is ready, click Select CSV or XLSX File to choose it, or simply drag and drop it into the upload area. Files can be up to 25 MB, and the updated import engine handles minor formatting differences behind the scenes.
Step 3: Review and Correct Any Errors
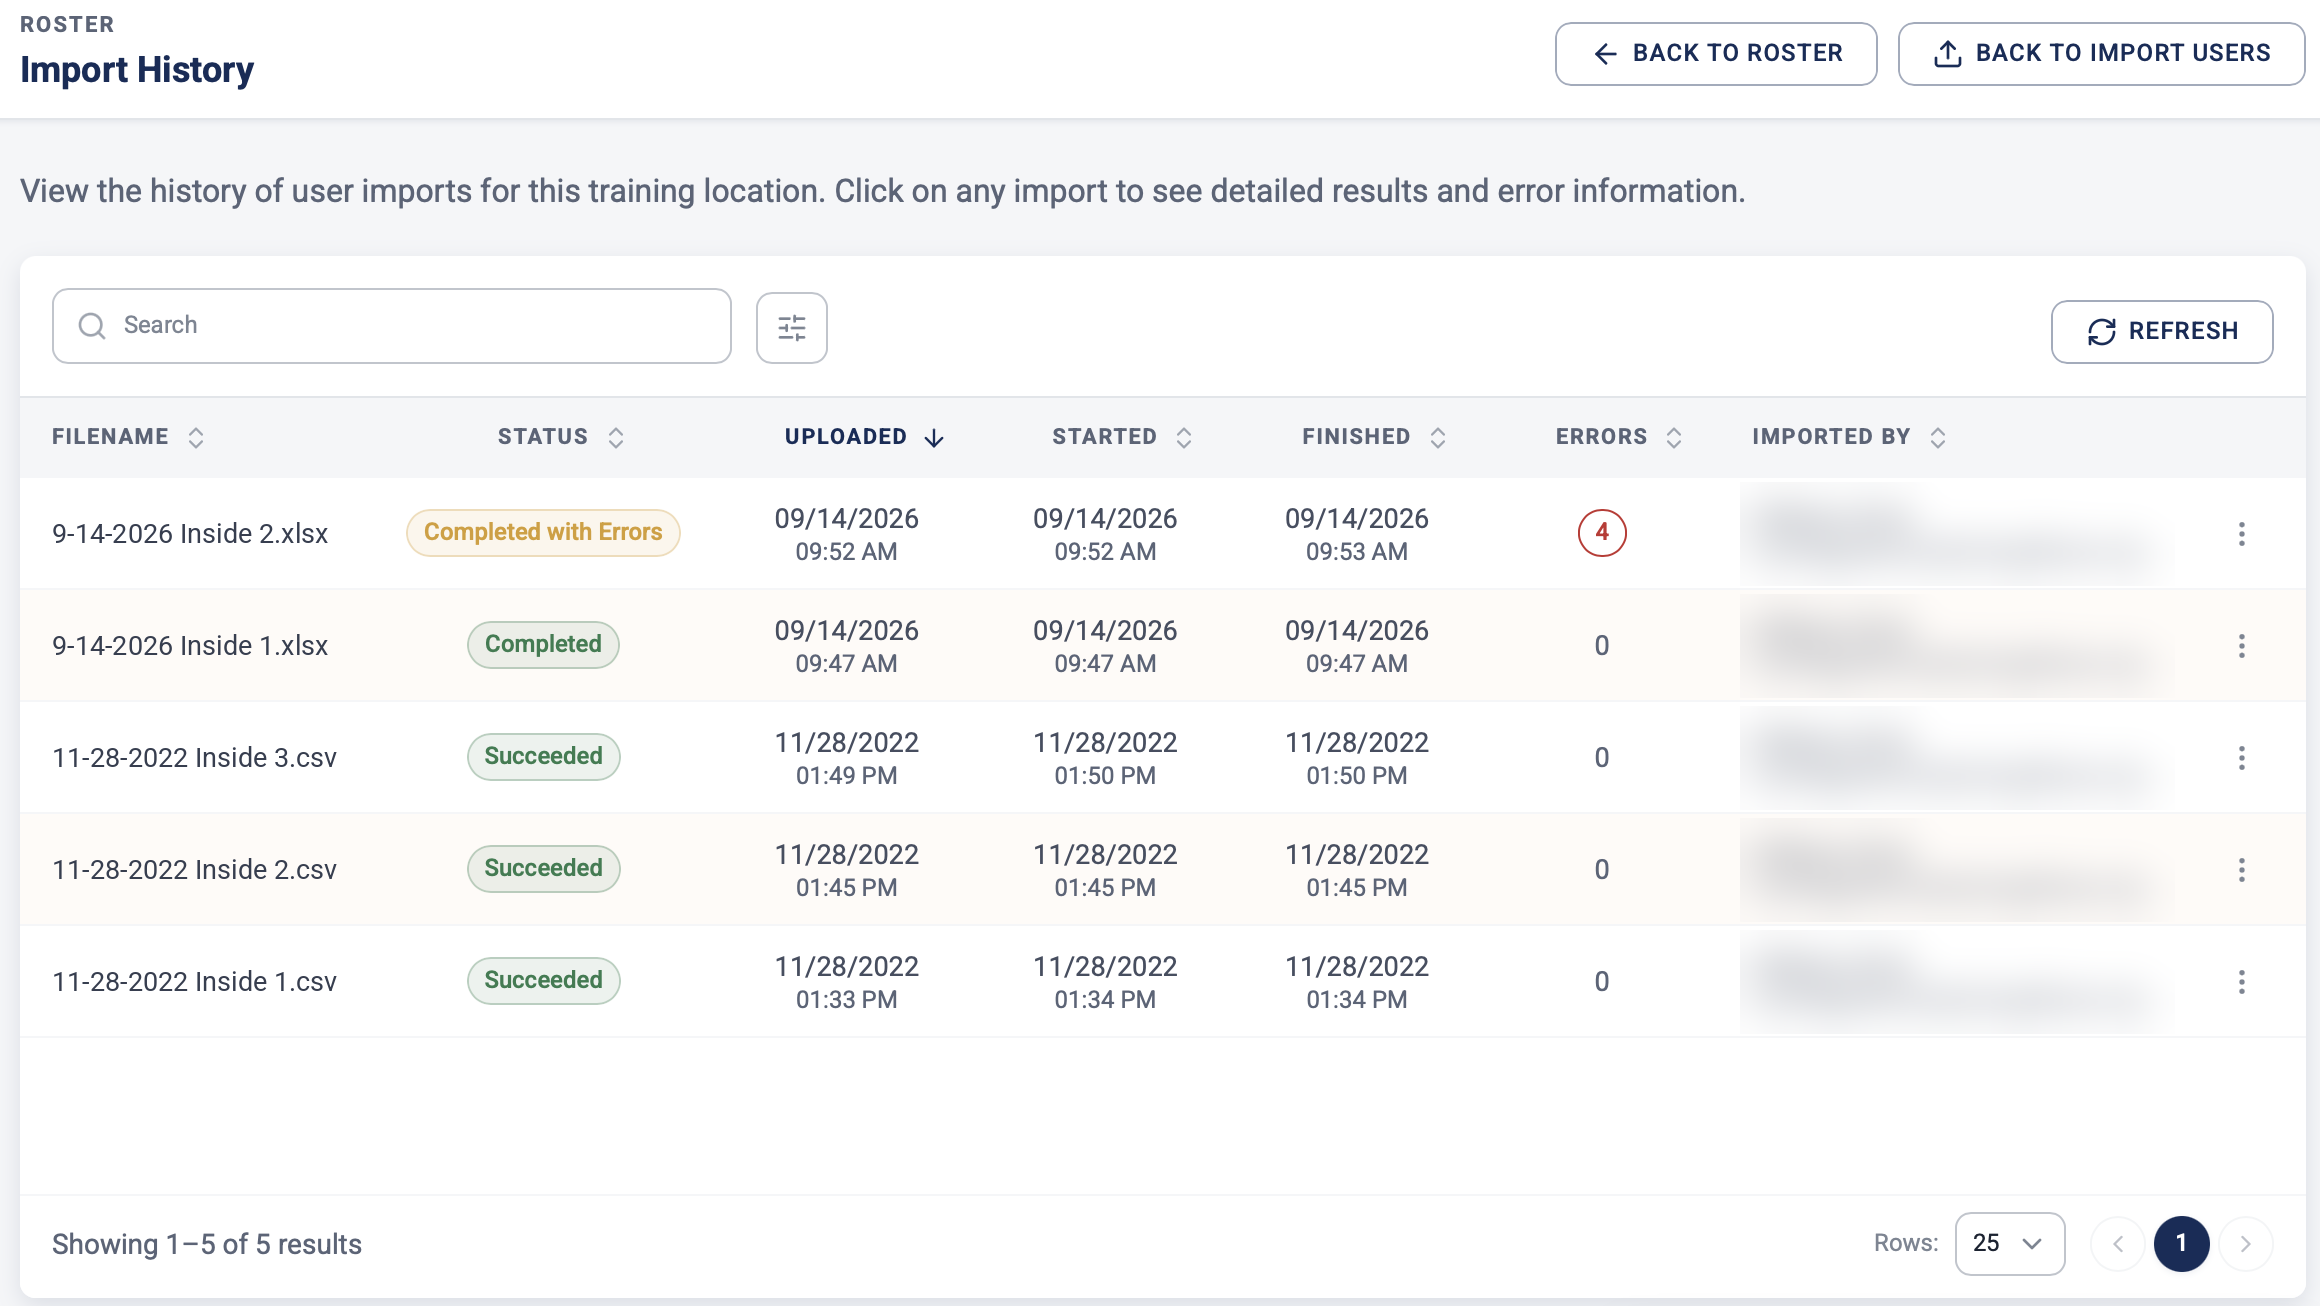
If an import needs attention, click View previous import errors on the import screen, or use the Import History button at the top of the page. Import History lists every upload for your training location, including past imports, along with each one’s status, timing, and number of errors. Imports that need a closer look are clearly flagged, so you can find them quickly.
Clicking an import opens its details. A summary at the top shows how many records were imported, how many need attention, and how many were already in your roster. Below that, each row from your file is listed by row number, with every field marked so you can see exactly which values need a fix. For example, a missing email address is clearly flagged, along with a note about how many fields in that row need attention. Use the tabs to focus on just the rows that need attention, update those rows in your file, and upload it again.
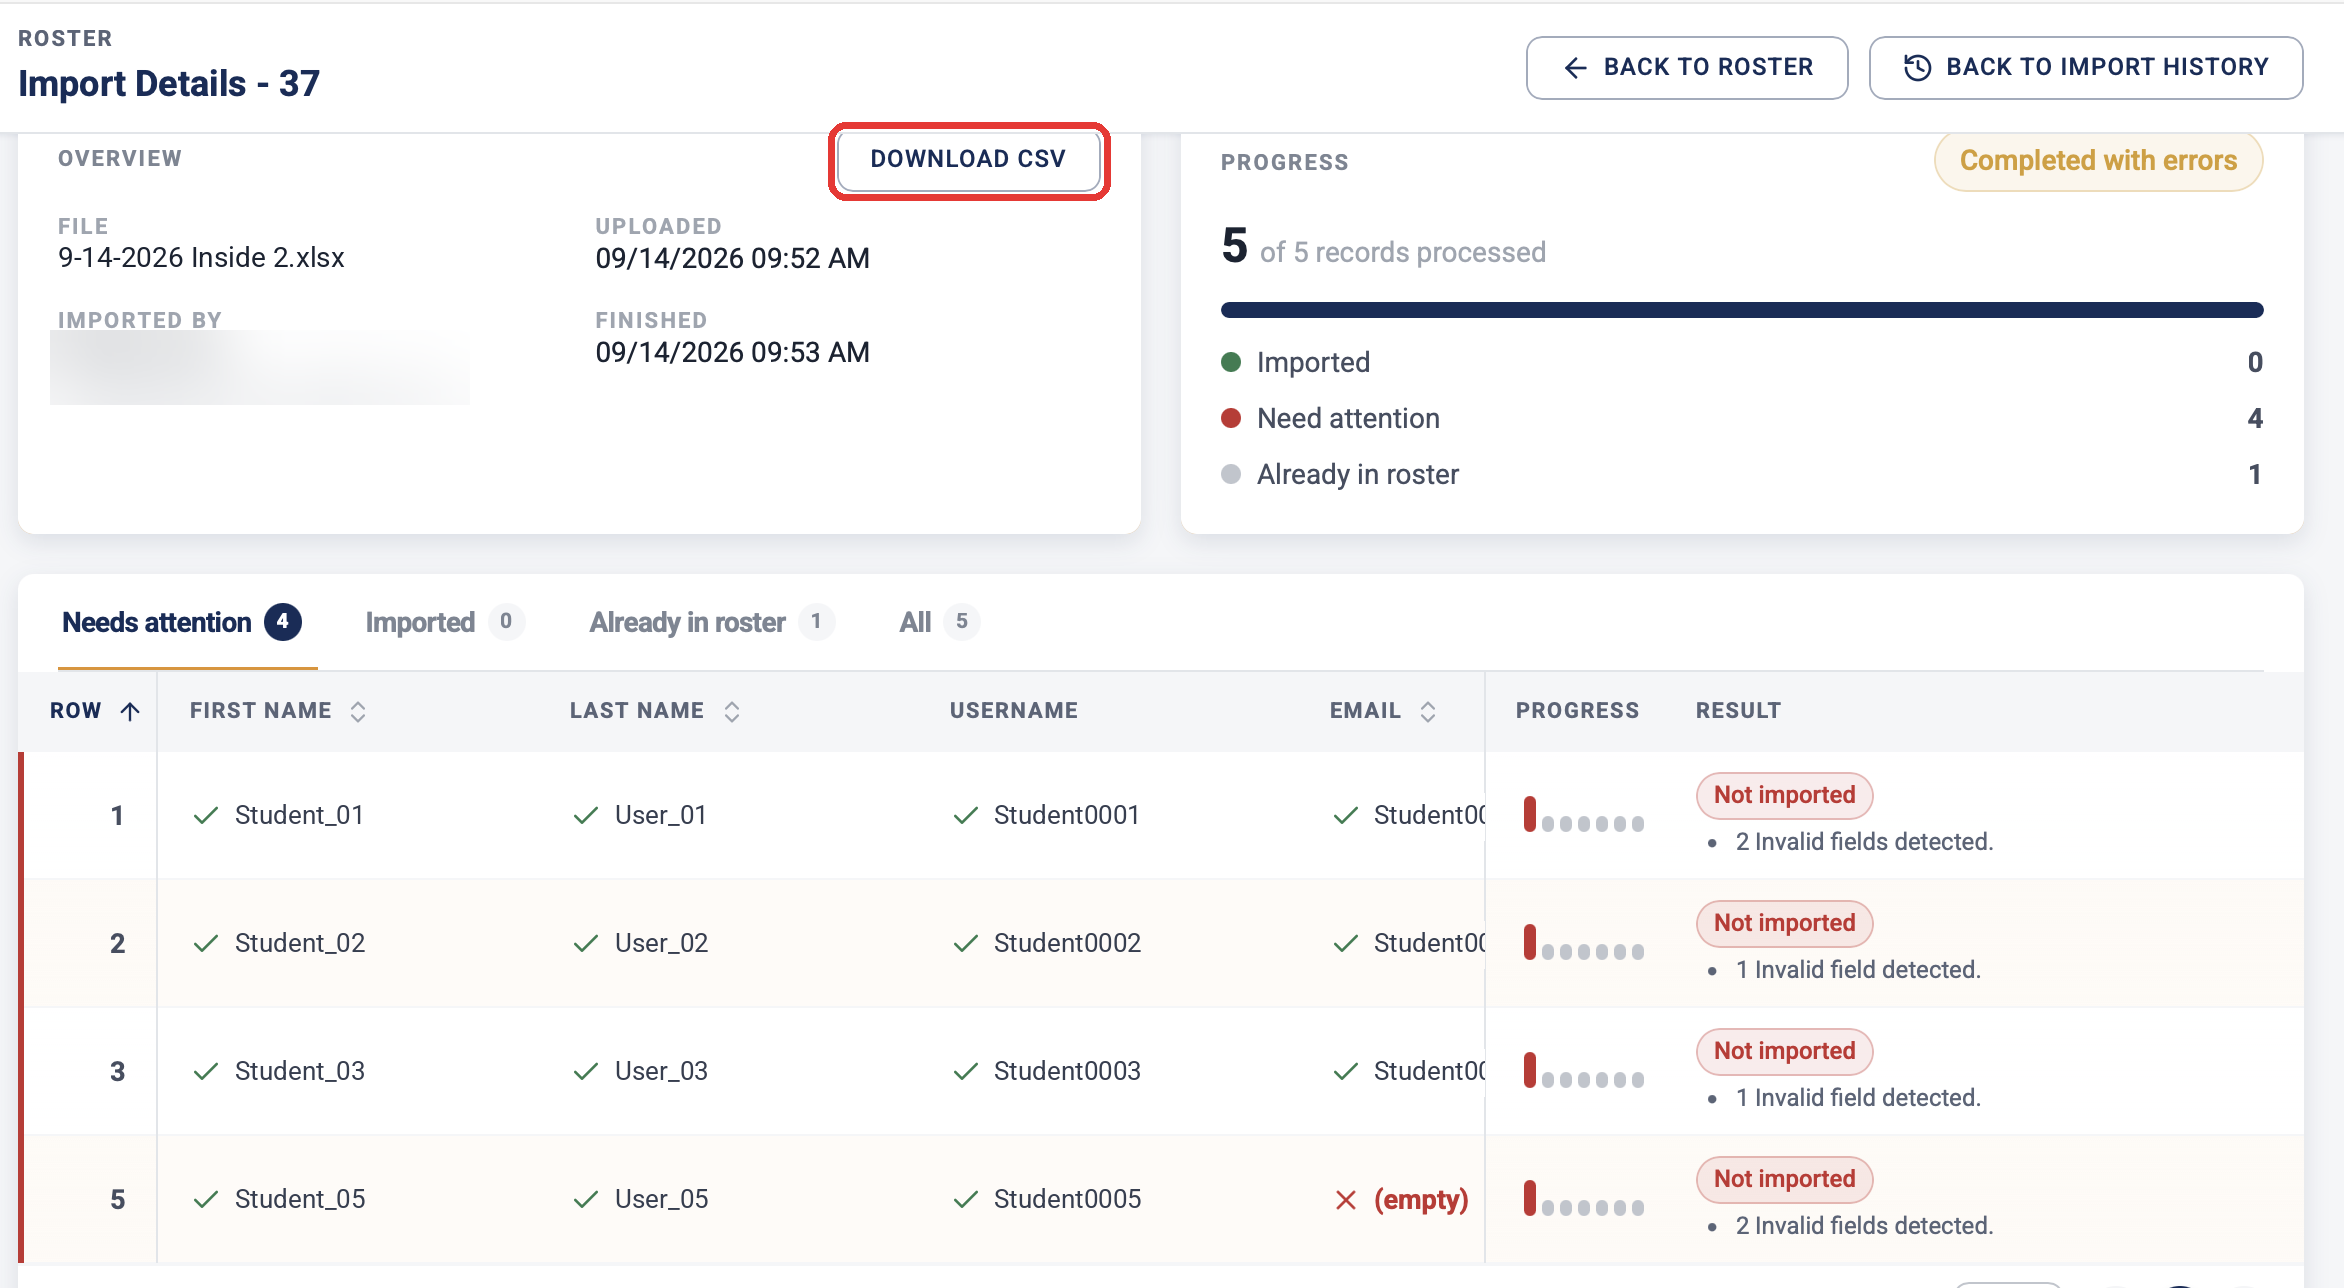
Prefer to work in your spreadsheet? Click Download CSV to get a copy of your upload file with a new first column showing the result for each row. It’s the same information shown on screen, in a format you can sort and filter as you make your corrections.
When Will I See the Changes?
The updated import screen will go live on October 6, 2026, replacing the current version. There’s nothing you need to do to prepare. Your existing workflow will continue to work just as it does today, and your past imports will still be available in Import History.
Questions?
If you have questions or feedback about the updated import experience, reach out to our support team using the PTSI Support link in the left-side menu. We’d love to hear how it’s working for you.